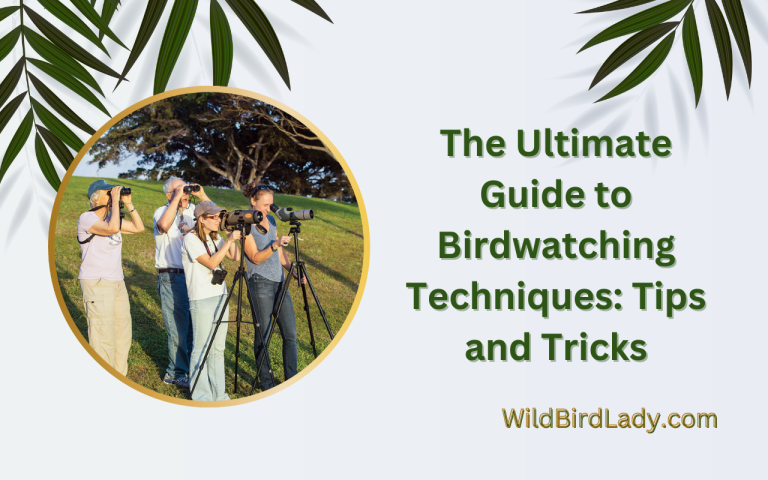
Mastering Photography Techniques for Birdwatching Excursions
Photography techniques for birdwatching require patience and careful planning. Knowing the habits and behaviors of the birds you want to capture is key.
Birdwatching and photography go hand in hand as utilizing photography techniques to capture birds can enhance your birdwatching experience. However, it is essential that you have the right equipment and have thoroughly researched the birds you want to capture. Understanding the birds’ behavior can help you choose the right location, time of day, and camera settings to achieve the best results.
Additionally, having an eye for composition and creativity can elevate your bird photos to a new level. In this article, we’ll explore some of the best photography techniques for birdwatching and how to apply them for breathtaking results.

Credit: www.amazon.com
Understanding Bird Behavior And Habitats For Optimal Photography Opportunities
Observing Bird Behavior: Where Do Birds Perch And Fly? What Are Their Feeding And Nesting Habits? How Can You Predict Their Movements?
Bird photography demands a keen understanding of bird behavior. This knowledge helps bird photographers anticipate a bird’s movements, ensuring they capture the perfect shot. Here are some things to keep in mind while observing bird behavior:
- Where do birds perch and fly? : Birds generally perch and fly in three different locations- the ground, tree branches, and in the air. Look out for these locations to determine their behavior.
- What are their feeding and nesting habits? : Birds also have different feeding and nesting habits. Some birds feed from a specific type of flower or fruit, while others hunt and scavenge. Nesting behavior can vary from a simple nest in a tree cavity to an elaborate nest in a birdhouse.
- How can you predict their movements? : Habits such as feeding, nesting, and migration can help photographers anticipate a bird’s movements. Knowledge of a bird’s behavior and habitat also help to determine where to set up and what gear to bring.
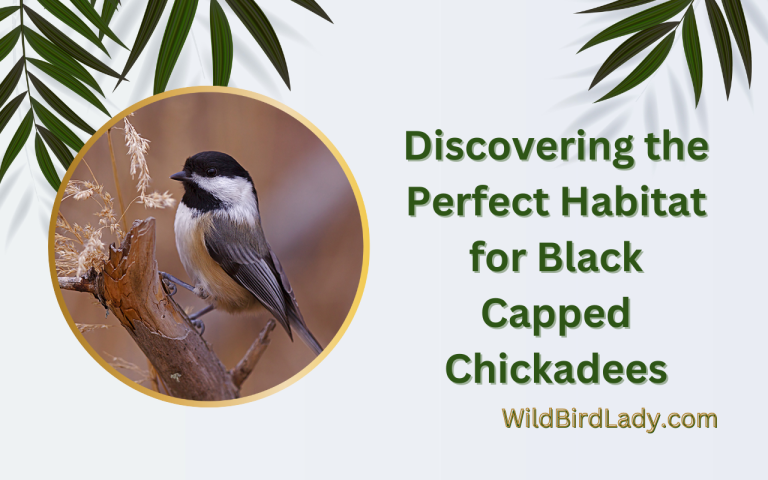
Identifying Bird Habitats: Where Do Birds Live And Thrive? What Kinds Of Environments Are Conducive To Bird Watching And Photography?
Identifying bird habitats is essential in bird photography. Understanding where specific bird species live can increase the likelihood of capturing a stunning shot. Below are some tips for identifying bird habitats:
- Where do birds live and thrive? : Birds live in various habitats such as forests, wetlands, and even urban areas. Some birds prefer to live near a specific water source, while others thrive in open fields.
- What kinds of environments are conducive to bird watching and photography? : Bird photographers must search for environments that appeal to birds. Understanding a bird’s characteristics, preference for nesting, and feeding habits helps identify the ideal location. Environments like national parks, reserves, and wildlife sanctuaries offer the perfect opportunity for bird photography.
Utilizing Field Guides And Apps To Identify Bird Species And Their Behaviors
Bird photography requires knowledge of different bird species and their specific behaviors. Utilizing field guides and apps can help photographers identify and study various bird species. Here are some ways to utilize field guides and apps:
- Download birdwatching apps: A wide variety of bird identification apps is available online. They feature recordings of bird calls and help in identifying birds by appearance, size, and habitat.
- Use bird identification field guides: Physical and digital field guides offer detailed illustrations and descriptions of bird species, their characteristics, and habitat preferences. These guides also help in bird identification and behavior study.
By understanding bird behavior and habitats and utilizing field guides and apps, bird photographers can capture stunning photos of local and migratory birds. Whether in the backyard or on a birding expedition, preparation and knowledge are key to successful bird photography.
Selecting The Best Gear And Equipment For Bird Photography
Choosing The Right Camera: What Are The Technical Specifications To Look For?
To capture stunning bird photographs, you will need a camera with the right technical specifications. Here are some factors to consider when selecting a camera:
- Sensor size: Cameras with larger sensors can capture better image quality.
- Autofocus system: Choose a camera with a fast and accurate autofocus system to keep birds in focus.
- Burst rate: Look for a camera with a high burst rate to capture birds in flight or sudden movements.
- Iso range: A camera with a wide iso range will allow you to shoot in different lighting conditions.
- Megapixels: While higher megapixels may seem ideal, it may not always be necessary for bird photography.
What Kind Of Lenses Are Best For Bird Photography?
The lens you choose is just as important as the camera itself. Here are some lenses to consider for bird photography:
- Telephoto lens: A lens with a long focal length, such as a 400mm or 600mm, will allow you to capture birds from a distance.
- Zoom lens: A zoom lens with a wide range, such as 100-400mm, will give you more flexibility in framing shots.
- Image stabilization: A lens with image stabilization can help reduce camera shake and produce sharper images.
- Aperture: A larger aperture, such as f/2.8 or f/4, will allow more light in and enable you to use faster shutter speeds.
Understanding Camera Settings: How Can You Adjust Aperture, Shutter Speed, And Iso For Optimal Results?
Having a good understanding of camera settings is crucial for bird photography. Here are some tips on adjusting settings for optimal results:
- Aperture: A wider aperture, such as f/4 or f/5.6, will give you a shallower depth of field and make the bird stand out from the background.
- Shutter speed: A fast shutter speed, such as 1/1000s or higher, will freeze the bird’s movements.
- Iso: Use the lowest iso possible to maintain image quality and reduce noise.
- Exposure compensation: Adjust exposure compensation to avoid over or underexposed images.
- Manual mode: Use manual mode to have full control over your settings.
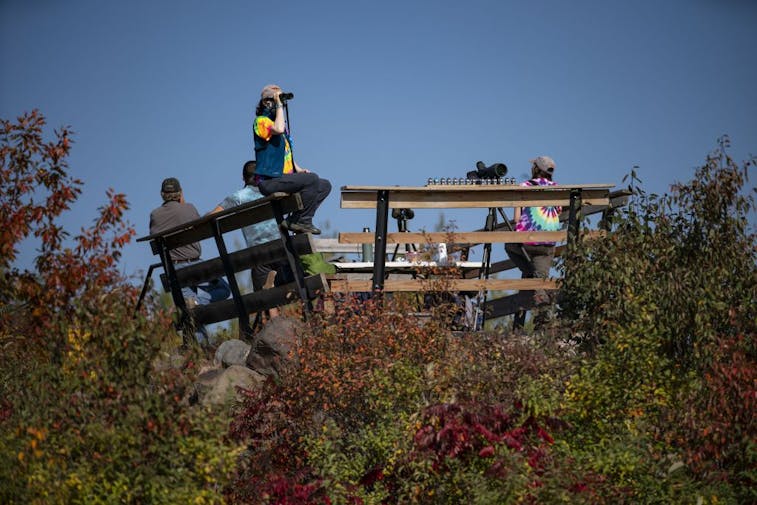
Accessories For Bird Photography: Tripods, Monopods, Lens Hoods, And More
Having the right accessories can make a big difference when it comes to capturing great bird photographs. Here are some accessories to consider:
- Tripod: A tripod can help stabilize your camera, especially when using longer lenses.
- Monopod: A monopod can offer more flexibility than a tripod and still provide some stabilization.
- Lens hood: A lens hood can help reduce glare and protect your lens from damage.
- Camera bag: Invest in a good camera bag that will protect your equipment and make it easy to carry.
- Bird blinds: Consider using bird blinds to get closer to birds without disturbing them.
Remember, the most important thing is to have patience and practice. With the right gear and techniques, you can capture stunning bird photographs that will amaze and inspire.
Techniques And Tips For Capturing The Perfect Shot
Composition Tips For Bird Photography: How Can You Frame Your Shots To Create Impactful Images?
Capturing the perfect shot of your feathered subjects involves more than just aiming your camera and clicking the shutter. With bird photography, composition is key. Here are some composition tips to keep in mind:
- Rule of thirds: One of the most basic and effective composition rules is the rule of thirds. When framing your shot, imagine a grid with nine equal sections over the image. Place your subject where the lines cross to create a more interesting and appealing composition.
- Balance: Aim for balance in your composition by distributing the visual weight of your image evenly. If your subject is on one side of the frame, include something on the opposite side to balance it out, such as a tree or a landscape.
- Zoom in: Get close to your subject, zooming in to fill the frame with the bird. This technique can help you to create a more intimate and engaging image, emphasizing details in the bird’s feathers and features.
Using Light To Your Advantage: What Are The Best Times Of Day And Weather Conditions For Bird Photography?
Apart from composition, the light is another essential factor when it comes to bird photography. Here are some tips to help you make the most of the light in your images:
- Golden hours: The best times of day for bird photography are the golden hours, which are the moments of sunrise and sunset when the light is soft and warm. This time of day can help you to capture images with beautiful golden light and long shadows.
- Cloudy days: Overcast days may not seem ideal for photography, but they are actually perfect for bird photography. Cloudy days provide soft, diffused light that eliminates harsh shadows and allows you to capture images with more even lighting.
- Backlighting: Backlighting can create stunning images that bring your bird to life. Position yourself so that the sun is behind the bird, and shoot your image, capturing the unique silhouette of the bird against a bright, vibrant background.
Tips For Focus And Depth Of Field: How To Ensure Your Subject Is In Sharp Focus, And How To Create Depth In Your Images.
To capture a bird in sharp focus, it’s essential to know how to set your focus point and choose the right depth of field. Here are some tips to help you capture sharp, engaging images:
- Focus point: For bird photography, it’s best to use a single-point autofocus mode to ensure that your subject is in sharp focus. Select the autofocus point closest to the bird’s eye, which will ensure that the image is sharp where it matters most.
- Aperture: The aperture you choose will affect the depth of field in your image. For bird photography, choosing a wide aperture (low number) can help blur the background, creating a shallow depth of field and putting more focus on the bird itself. However, be sure to use a faster shutter speed to avoid camera shake and capture sharp images.
- Distance: The distance between the bird and the background can also affect the depth of field. The closer the bird is to the camera, the shallower the depth of field. Placing some distance between the bird and the background can help create more depth in your image.
With the right techniques and tips, you can create stunning images of birds that capture their beauty, grace, and personality. Put these tips to use on your next bird photography adventure and see the difference it makes in your photos.
Editing And Post-Processing For Bird Photography
Selecting The Right Software For Post-Processing: What Are The Best Tools For Editing And Enhancing Bird Photos?
When it comes to post-processing bird photos, selecting the right software can make a big difference in the final product. Here are some of the best tools for editing and enhancing your bird photos:
- Adobe photoshop: This well-known software is a popular choice among photographers due to its versatility and range of features. It’s particularly useful for adjusting exposure, colors, and contrast in bird photos.
- Lightroom: Another adobe product, lightroom is a simpler version of photoshop that is specifically designed for photo editing. It’s a great tool for organizing, grouping, and editing bird photos in large batches.
- Topaz studio: This software is particularly useful for sharpening and noise reduction in bird photos. It uses artificial intelligence to optimize photos for specific types of noise and details, making it a valuable tool for any bird photographer.
Techniques For Adjusting Exposure, Color, And Contrast: How To Enhance Your Images Without Over-Editing?
While editing can be a valuable tool for enhancing bird photos, it’s important to do so in a way that doesn’t look overdone or unnatural. Here are some techniques for adjusting exposure, color, and contrast in a way that enhances your images without over-editing:
- Start with a well-exposed photograph: The better the photograph is straight out of your camera, the less editing it will require.
- Adjust exposure and contrast gradually: Use the histogram tool to adjust exposure and contrast gradually to avoid any unwanted or unnatural effects.
- Be subtle with color edits: Changes to color can be particularly noticeable, so make sure adjustments are subtle and don’t drastically alter the look of your photo.
- Avoid over-sharpening: While sharpness can be important in bird photography, over-sharpening can lead to an unnatural and distracting look.
Tips For Sharpening And Noise Reduction: How To Make Your Bird Photos Crisp And Clear While Minimizing Distractions
Sharpening and noise reduction can have a big impact on the overall quality of your bird photos. Here are some tips for sharpening and noise reduction to help make your bird photos crisp and clear while minimizing distractions:
- Use the unsharp mask tool: This tool can help enhance the details in your bird photos without introducing noise or distractions.
- Adjust sharpening for individual features: Instead of sharpening the entire photo, focus on specific features of the bird, such as the eye or feathers.
- Be careful with noise reduction: While noise reduction can be helpful, too much of it can make your photos look blurry and unnatural. Use noise reduction sparingly and only in areas where there is a high level of visible noise.
Capturing Birds In Motion: Advanced Techniques For Experienced Photographers
Techniques For Capturing Birds In Flight: How To Freeze Motion And Create Dynamic Images
Capturing birds in flight is a challenging and exciting aspect of bird photography that requires some technical skills and proper equipment. Here are some expert techniques for freezing motion and capturing dynamic images of birds in flight:
- Use a fast shutter speed: The faster your shutter speed, the easier it is to freeze the movement of a bird in flight. Set your camera’s shutter speed to at least 1/1000th of a second.
- Choose a fast burst mode: Use the continuous shooting mode to take multiple shots in a quick succession so that you don’t miss a single moment of the bird in flight.
- Be aware of the light conditions: To avoid blurry images, it’s important to have enough light when taking photos of birds in flight. A fast shutter speed may require a higher iso setting to allow more light into the camera.
- Use manual focus: Set your camera to manual focus to avoid any mistakes in focusing on the bird’s flight path.
- Be patient and ready: Keep your camera ready at all times, and be patient to wait for the perfect moment to click the shutter button.
Panning Techniques For Tracking Moving Birds: How To Create Motion Blur And Convey A Sense Of Movement
Panning is a technique that involves moving the camera along with the movement of the bird to capture motion blur and convey a sense of movement. Here are some tips for panning:
- Use a low shutter speed: A slow shutter speed, say 1/60th of a second, will create motion blur in the background while keeping the bird in focus.
- Keep the bird in the same spot in the viewfinder: Follow the bird’s movement with your camera, keeping it in the same area of the frame.
- Keep your arms steady: Keep your arms and camera steady while following the bird’s movement. Practice panning with your camera before you go out to shoot birds.
- Experiment with different shutter speeds: Try different shutter speeds to capture various motion blur effects.
Creative Techniques For Capturing Unique Bird Moments: Silhouettes, Reflections, And Unusual Vantage Points
Creating unique, artistic, and eye-catching bird photographs requires a creative approach. Here are some techniques that can help you capture unique bird moments:
- Silhouettes: Wait for the perfect sunset or dawn and capture a dark silhouette of a bird against a brightly colored sky.
- Reflections: Try to catch a bird’s reflection in the water by shooting from a low angle near a pond or lake.
- Unusual vantage points: Find a unique angle to shoot birds from, like from the top of a hill or a nearby rooftop.
- Play with lighting and shadows: Highlight the bird’s natural beauty by playing with shadows and lighting to create a dramatic effect.
- Patience is key: Sometimes, the best shots come from sitting and waiting for hours until the birds come to you or create a magical event.
By using these advanced photography techniques, experienced bird photographers can capture stunning images of birds in motion, conveying the elegance and beauty of these incredible creatures. Practice the above tips and techniques, and experiment with your own creative ideas to capture breathtaking bird photographs.
Conclusion: Master These Techniques To Capture Amazing Bird Photography
Bird photography is a challenging but rewarding hobby that requires patience, skill, and a sound understanding of photography techniques. Whether you’re a seasoned bird photographer or a beginner, mastering certain aspects of the craft is essential to capturing stunning bird photos.
In this guide, we’ve outlined some of the most crucial techniques for bird photography to help you improve your skills and produce amazing photographs. Here are some key takeaways:
Summarizing The Key Takeaways From This Guide
- The key to bird photography is to have a sound knowledge of camera settings, lighting, and composition
- Understanding bird behavior and habitat is crucial for capturing dynamic and engaging photos
- Investing in the right gear, such as a long lens and a sturdy tripod, can make a significant difference in the quality of your photos
- Patience, practice, and persistence are essential ingredients for improving your skills and capturing stunning bird photos
Inspiring Readers To Get Started With Bird Photography
If you’re intrigued by the idea of bird photography, there’s never been a better time to start. With so much information and resources available, the learning curve for bird photography has never been more accessible. Here are some ideas to get you started:
- Join a local birdwatching group or photography club to learn from experienced photographers
- Practice shooting birds in your backyard or a nearby park
- Attend bird photography workshops and seminars to learn from experts in the field
- Experiment with different techniques and settings to find what works best for you
Encouraging Experimentation And Practice To Continue Improving Skills
The best way to improve your bird photography skills is through practice and experimentation. Here are some tips to help you continue honing your skills:
- Try shooting birds in different lighting conditions, such as early morning or late evening when the light is softer
- Play around with different camera settings, such as shutter speed, aperture, and iso, to achieve different effects and styles
- Experiment with different compositions and angles to add interest and depth to your photos
- Take the time to study and learn from your shots, identifying areas for improvement and building on your successes
By mastering these techniques and continuing to practice and experiment, you can capture amazing bird photos that showcase not only the beauty of these incredible creatures but also your skills as a photographer. So grab your camera, head out into the great outdoors, and start capturing stunning images of birds today!
Frequently Asked Questions Of Photography Techniques For Birdwatching
What Are Some Tips For Photographing Birds In Flight?
To photograph birds in flight, it is important to use a fast shutter speed and keep the bird in the center of the frame. Anticipating the bird’s movement is also key, as is using a burst mode to capture multiple images.
What Kind Of Lens Is Best For Bird Photography?
A telephoto lens is best for capturing birds in detail and minimizing disturbance. Look for a lens with a focal length of at least 300mm. A zoom lens with a longer focal length can be useful for flexibility in the field.
How Can I Improve My Bird Photography Skills?
Improving your bird photography skills can be achieved through practice and experimentation. It is important to understand your equipment and the behaviors of the birds you are photographing. Try different techniques, such as shooting in different lighting, using different angles, and practicing patience.
What Time Of Day Is Best For Bird Photography?
The best time of day for bird photography is during the “golden hours” of sunrise and sunset. The light during these times is soft and warm, making for more pleasing images. However, birds can be active at any time of day, so don’t limit yourself to just these times.
How Can I Get Closer To Birds For Photography?
Getting closer to birds for photography can be achieved through stealth and patience. Move slowly and quietly and use natural camouflage. You can also try using a bird blind or hiding behind cover to approach birds unnoticed. Remember to always respect the birds and their habitats.
Conclusion
As you can see, birdwatching photography is a rewarding hobby that requires patience, perseverance, and a little bit of luck. With the right equipment and techniques, you can capture stunning images of a wide variety of birds in their natural habitats.
Remember to be respectful of their environment and follow ethical birdwatching practices at all times. Use your creativity to experiment with different angles, lighting, and composition to capture unique shots. Don’t be afraid to step out of your comfort zone and take risks with your photography.
Whether you are a beginner or an experienced birdwatching photographer, there is always room for growth and improvement. With these tips and techniques, you can bring your birdwatching photography to the next level and enjoy the beauty and wonder of these fascinating feathered creatures.