How to Hatch Dove Eggs Successfully: My Step-by-Step Guide
Hi there, I’m Rifat Ahmed—and if you’re anything like me, there’s something magical about watching the quiet coo of a dove evolve into the fluttering wings of new life. As a long-time birdwatcher and dove enthusiast, I’ve spent countless hours observing, nurturing, and yes—learning from both success and failure while hatching dove eggs. Today, I want to share with you everything I’ve learned along the way.
Whether you’ve discovered a delicate nest in your backyard or you’re preparing to breed doves at home, this guide is packed with the kind of real-world advice I wish someone had handed me when I started. Let’s dive into this remarkable journey together—feathers, flaps, and all.

Why I Started Hatching Dove Eggs
My passion for birds began in my teenage years, but it wasn’t until I stumbled upon an abandoned mourning dove nest in my garden that I considered helping dove eggs hatch. It was early spring, and two little white eggs sat quietly under a low bush—no parents in sight for hours. I waited, watched, and researched. Eventually, I brought them in and tried my hand at incubation.
That experience turned into a journey of love, learning, and dedication. And today, I’m here to walk you through every critical step of that process—from identifying healthy dove eggs to ensuring those fluffy hatchlings thrive.
Understanding Dove Eggs: The First Clue to Success
Before you can hatch dove eggs, you have to know what you’re dealing with.
Physical Characteristics of Dove Eggs
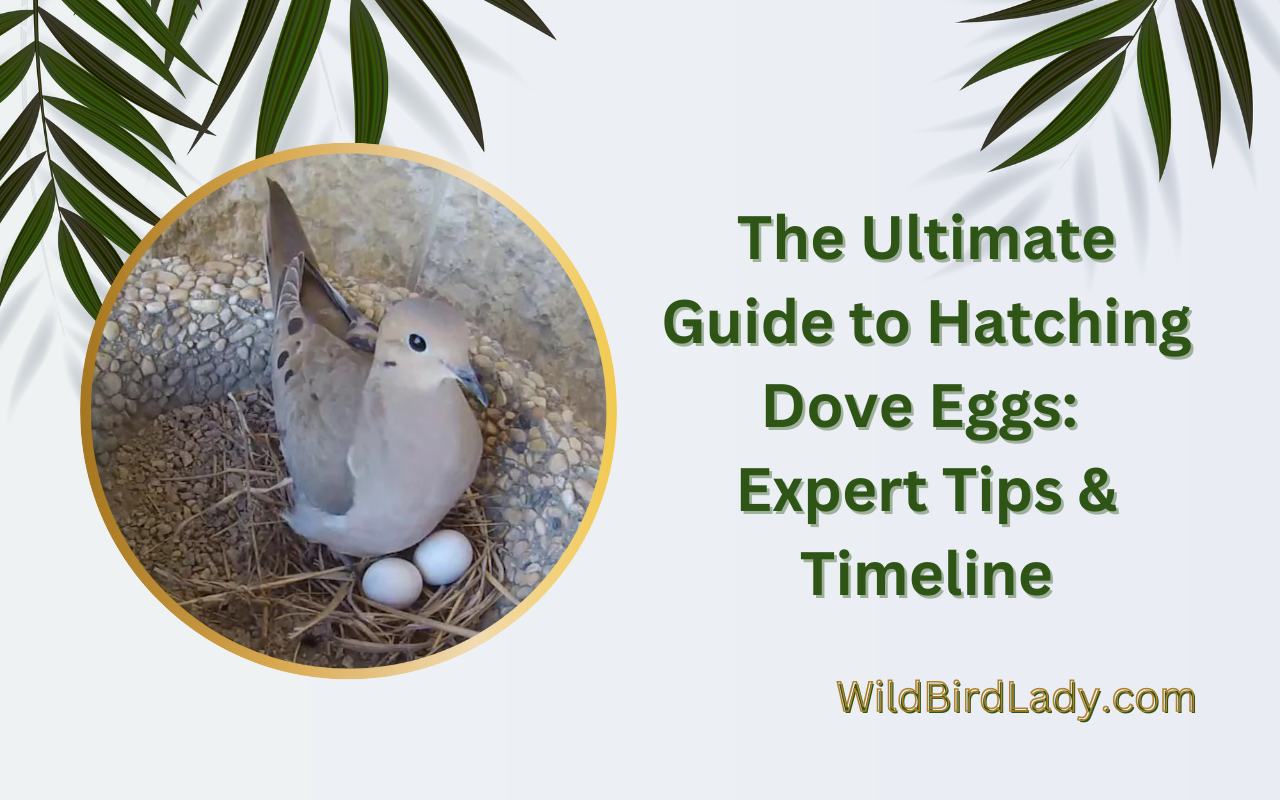
Dove eggs are beautifully simple—small, oval, and smooth to the touch. In my experience:
- Mourning dove eggs average about 1.25 inches long and 0.9 inches wide.
- They’re often white or off-white, with a slight pinkish hue if light hits them just right.
- The shell is delicate and almost translucent, especially when candled (more on that later).
Be careful handling them—these shells aren’t just fragile; they’re also the home of a growing life.
Different Types of Doves, Different Eggs
Over the years, I’ve cared for a few dove species. Here’s a quick cheat sheet based on my hands-on experience:
- Ring-necked Doves: Lay bright white, glossy eggs.
- Diamond Doves: Eggs are smaller and cream-colored, with a bit more texture.
- Zebra Doves: Tiny, silky white eggs—very easy to miss if you’re not careful!
No matter the species, the goal is the same: provide the right conditions to help life emerge safely.
Preparing for Success: What I Learned the Hard Way
Selecting the Right Dove Pair
Trust me, not every pair of doves is ready for the job. In my first attempt, I had a mismatched pair—one too young, the other clearly disinterested in nesting. That taught me to look for:
- Healthy, mature doves (at least 6 months old, though I wait until a year for best results).
- Same species, similar size to avoid dominance or aggression.
- Signs of bonding—preening each other, staying close, cooing in harmony.
Nesting Setup: Comfort Equals Confidence
When I started, I used a simple plastic container with hay. It worked, but I’ve since learned better. Here’s what I recommend:
- Use a spacious nesting box with soft bedding (shredded paper, straw, or clean hay).
- Keep it in a quiet, dim corner of the room—somewhere they won’t be startled.
- Make sure the area is draft-free but well-ventilated.
- Always clean and disinfect before placing new bedding.
My birds seem to lay more confidently when they feel safe and warm. That’s no coincidence.
Pre-Laying Nutrition and Hygiene: The Foundation of Fertility
Feeding for Fertility
Doves on a proper diet are more likely to lay viable eggs. Before egg-laying season, I boost their meals with:
- High-quality seed mix rich in millet and safflower.
- Dark leafy greens like kale and spinach.
- Calcium supplements (cuttlebone or crushed eggshells) to strengthen their shells.
- Occasional boiled egg or soaked lentils for added protein.
Don’t forget clean, fresh water every day. Dehydrated doves won’t breed well—period.
Hygiene = Healthy Eggs
Cleanliness is more than aesthetics. It’s survival.
- I deep clean my nesting area weekly—more often during breeding.
- I sanitize using bird-safe disinfectants and rinse everything thoroughly.
- Bedding gets changed every 2–3 days, especially after droppings or spilled food.
These small steps prevent mold, bacteria, and insects from harming the eggs.
The Incubation Process: Where the Magic Happens
Now we get to the heart of the journey.
Ideal Temperature and Humidity
I use a reliable incubator when natural parents aren’t available. Here’s what I’ve found works best:
- Temperature: 99.5°F to 100.5°F is the sweet spot.
- Humidity:
- First 12 days: 50%–55%
- Last few days: 65%–70%
You’ll want a thermometer and hygrometer inside the incubator. I learned the hard way that external monitors aren’t always accurate.
Egg Turning: Yes, It Matters
If you’re incubating manually (like I did my first time), remember to:
- Turn eggs 3–5 times daily.
- Use an “X” and “O” on each side to keep track.
- Never turn the same direction every time—alternate for balance.
Eggs that aren’t turned can develop stuck embryos, which rarely survive.
Candling Dove Eggs: A Peek Inside the Shell
Candling is when you shine a light through the egg to check development. Around day 7–10, I use a small flashlight and look for:
- A dark spot (the embryo).
- Blood vessels spreading outward like roots.
- Clear signs of growth compared to the original translucent state.
If the egg stays completely clear by day 10, it’s probably infertile.
Hatching Time: When Patience Pays Off
Timeline: What to Expect
Here’s the general timeline I’ve recorded over multiple hatches:
- Incubation: 14–17 days
- Pipping (first crack): Day 16 or 17
- Full hatch: Usually day 18
- Fledging: Around day 21 to 28
Each hatchling has its own rhythm. Some take longer. I don’t interfere unless it’s been over 24 hours after pipping.
Post-Hatch Care
When the chicks arrive:
- Keep them warm (90–95°F in early days).
- Offer soft bedding and remove droppings daily.
- Avoid deep water dishes—they drown easily.
- Feed with a syringe or spoon using a soft mash of soaked seed, baby bird formula, or mashed boiled egg yolk.
Common Hatching Challenges (and What I Do About Them)
Hatching dove eggs is one of the most rewarding yet delicate parts of raising birds. Over the years, I’ve faced my fair share of unexpected hiccups, especially when I was just getting started. Some of these challenges can be heartbreaking if you’re not prepared—but the good news is, most of them have simple, effective solutions. Here’s a deeper look at the most common hatching problems I’ve encountered and how I’ve learned to handle each one through trial, error, and a lot of observation.
1. Eggs Don’t Hatch on Time
When I first started hatching dove eggs, I remember nervously staring at the incubator on day 18, then day 19… then day 21—still no movement. I panicked, thinking I had done something terribly wrong.
But over time, I’ve learned that not all eggs follow the exact same schedule. Sometimes, a chick is just a “late bloomer” and may hatch a day or two after the expected window (typically 14–17 days for doves). Other times, though, the delay signals a bigger issue—like infertility or embryo death.
What I Do Now:
- Candling: On day 7 and again around day 14, I candle each egg using a small LED flashlight in a dark room. If I see visible blood vessels and movement, I know the embryo is developing. If the egg looks clear or has a dark, motionless ring, it likely stopped developing or was never fertile to begin with.
- Wait Until Day 21: I always give the eggs up to 21 days before making any decisions. If there’s no sign of internal pipping or movement by then, I assume it’s not viable.
- Avoid Disturbing Too Early: I don’t crack open late eggs unless I’ve candled and confirmed that the embryo is no longer alive. Rushing this step can risk harming a live chick.
2. Shell Stuck to Hatchling (Sticky Chick Syndrome)
This one is heartbreaking—and I’ve been there more than once. A chick starts to pip but just can’t seem to break free. When I opened the incubator, I’d sometimes find a baby dove partially out, panting, with pieces of shell or membrane dried onto its body. This is usually caused by low humidity, which dries out the inner membrane and makes it too tough for the chick to escape.
What I Do Now:
- Monitor Humidity Closely: I aim for 50–55% humidity during the first 14 days, and then bump it up to 65–70% during the final days before hatching. I use a digital hygrometer to track levels accurately.
- Minimal Opening of Incubator: Every time the incubator is opened, humidity drops drastically. Now I avoid peeking inside during the final three days of incubation.
- Rescue Protocol: If a chick is truly stuck and it’s been 24 hours or more since external pip, I prepare a sterile cotton swab soaked in warm, clean water. Gently, I dab the dry areas of the membrane to rehydrate it—but only if the chick seems distressed and isn’t making progress on its own. Timing and gentleness are key here. Never pull on dry membrane—it can tear the chick’s delicate skin.
3. Chilling or Dehydration After Hatching
I learned this the hard way: dove hatchlings can lose body heat rapidly and become dehydrated in just minutes, especially if they hatch outside the scheduled window when I wasn’t watching. This can be deadly if not addressed immediately.
What I Do Now:
- Digital Thermostat with Backup Power: My incubator now runs with a precision digital thermostat and I’ve installed a small battery backup so that any power outage doesn’t lead to sudden temperature drops. It’s saved more than one clutch.
- Post-Hatch Heat Source: After hatching, I transfer the chicks to a brooder warmed to 90–95°F using a ceramic heat lamp or a heating pad under fleece-lined bedding. I monitor with a second thermometer to prevent overheating.
- Rehydration Protocol: If a hatchling seems lethargic or dry, I mix a small batch of warm water with electrolytes (like unflavored Pedialyte or a DIY sugar-salt solution). Using a sterile dropper, I gently offer a drop or two at a time, being careful not to aspirate. It’s amazing how quickly a chick will bounce back once hydrated.
Bonus Issue: Improper Air Circulation in Incubator
This one’s more subtle but just as important. I once lost an entire clutch because my incubator didn’t have adequate airflow—something I hadn’t thought much about at the time. The embryos developed normally, but they all failed to hatch.
What I Do Now:
- Use a Fan-Equipped Incubator: This keeps the air moving gently and ensures even distribution of heat and humidity throughout the chamber.
- Avoid Overcrowding: I now space eggs at least one inch apart, allowing proper airflow around each one.
- Regular Vent Checks: I make sure air vents are open during the final days of incubation to supply the growing chicks with enough oxygen.
In Summary
The road to successful dove hatching isn’t always smooth—but with time, care, and observation, I’ve learned how to handle these common challenges with confidence. Each problem taught me something new, and now, instead of feeling overwhelmed, I feel prepared.
If you’re just starting out, don’t be discouraged by early setbacks. Every hatch, successful or not, is a chance to learn and improve. And when you finally see that tiny, wobbly chick emerge from its shell? Trust me—it’s all worth it.
Raising Baby Doves: The Final Reward
After all the patience, care, and a little nail-biting during incubation, the real magic begins when the hatchlings arrive. Watching a baby dove grow from a fragile, blind bundle of fluff into a confident, cooing bird is nothing short of incredible. It’s easily the most rewarding part of the entire hatching journey—and one that never gets old, no matter how many times I experience it.
In the first few days, dove hatchlings are totally dependent on their parents—or on you, if you’re hand-raising. Their eyes are closed, they can’t regulate their body temperature, and their only goal is to eat and grow. And grow they do—fast.
Nutrition for Growing Doves
Baby doves, like pigeons, are fed a special substance called “crop milk” by their parents for the first few days. This is not dairy milk—it’s a nutrient-rich secretion from the lining of the crop that’s critical to early growth. If you’re hand-raising, you’ll need to simulate this nutrition carefully, especially in the first week.
📚 Learn more about crop milk and early nutrition in doves:
All About Crop Milk – The Spruce Pets
How to Hand-Feed Baby Doves – Beauty of Birds
🔹 Days 1–4: Total Dependence
If the parents are present and feeding, I let them do their job. They know what to do better than any of us. But if I’m hand-raising orphaned chicks, I use a commercial hand-feeding formula like Kaytee Exact or Higgins Intune, mixed to a warm, pudding-like consistency. Feeding is done with a sterile syringe, gently placed to the side of the beak to avoid aspiration.
Never squirt food directly into a baby dove’s mouth—they don’t gape like songbirds. Improper feeding can cause choking or fatal aspiration pneumonia.
Days 5–7: Transitioning to Solids
At this stage, the chicks begin opening their eyes and responding more actively to touch and sound. Their crop expands more easily, and they can digest slightly thicker food.
Here’s what I introduce during this period:
- Softened millet, canary seed, or dove mix soaked in warm water
- Mashed green peas and sweet corn (room temperature)
- Softer pieces of whole grain bread soaked in warm formula (occasionally)
I still supplement with hand-feeding formula if the chicks aren’t eating enough on their own or if the parents aren’t feeding consistently.
Weeks 3–4: Learning to Peck on Their Own
By the time they’re 3 to 4 weeks old, young doves start showing curiosity about their surroundings and—this always makes me smile—they begin pecking at seed trays.
This is a huge developmental milestone. Their beaks may be clumsy at first, but I keep a shallow tray of seeds and chopped greens nearby to encourage exploration. I also sprinkle a few seeds around their brooder space so they naturally learn to forage.
🎉 I still remember the first time one of my chicks picked up a millet seed and swallowed it—it felt like watching a baby take its first steps!
Hygiene and Socialization
Along with nutrition, hygiene is crucial. I change bedding daily, clean feeding tools with boiling water or a bird-safe disinfectant, and keep the brooder warm and dry. Around week 3, I gently begin to handle the chicks more often to get them used to human contact.
This early handling makes all the difference if you want gentle, tame doves that love to perch on your shoulder later on.
Guide to Dove Socialization:
📚 Guide to Dove Socialization:
How to Tame a Dove – PetHelpful
💡 Pro Tip:
If your baby doves are being raised by their parents, try not to interfere unless you absolutely need to. Let nature take its course while offering clean water, fresh seed, and a stress-free environment. But if you do have to step in, be ready for frequent feedings (every 2–3 hours), constant cleaning, and lots of patience.
The Final Reward
By week 4 or 5, those fragile babies will have grown full feathers, started fluttering their wings, and may even attempt short flights. From here, you can slowly transition them to a full adult diet of dove seed mix, grit, and the occasional veggie treat.
Watching them stretch their wings for the first time is a moment I never get tired of. It’s a proud, emotional reward for all the care that came before—and a reminder of how beautiful the process of raising life truly is.
Frequently Asked Questions
What Is The Incubation Period For Dove Eggs?
Dove eggs typically take about 14 days to hatch. However, the exact incubation period can vary depending on factors such as temperature and humidity levels.
How Do I Incubate Dove Eggs At Home?
You can incubate dove eggs at home using an incubator or a homemade setup. Make sure to regulate temperature and humidity levels carefully throughout the incubation period.
What Should I Expect During The Hatching Process?
During hatching, you may notice the eggs wobbling or see cracks appearing on the surface. Once the chicks start to break free from the shells, it can take several hours for them to hatch fully.
Final Thoughts from One Bird Lover to Another
Hatching dove eggs isn’t just about bringing life into the world—it’s about deepening your connection with nature, patience, and quiet perseverance. I’ve had failed hatches, miraculous rescues, and more than a few sleepless nights. But I wouldn’t trade any of it.
If you’re on the fence about hatching doves, I encourage you to try—with compassion, research, and care. You might just discover, like I did, that there’s nothing quite as heartwarming as hearing that first little “coo” from a chick you helped bring into the world.
Thanks for sharing this part of my journey. I hope it inspires yours.
🕊️ Quick Recap: My Top 10 Dove Hatching Tips
- Choose healthy, compatible doves.
- Prepare a safe, warm nesting box.
- Feed a nutrient-rich diet.
- Keep the environment clean and predator-free.
- Maintain 99.5°F and 50–70% humidity during incubation.
- Turn eggs regularly—mark them!
- Candle between days 7–10.
- Handle chicks gently and keep them warm post-hatch.
- Feed hatchlings with soft, warm, nutritious food.
- Enjoy every moment—it’s a beautiful process.
If you found this helpful, feel free to follow along as I share more birdwatching adventures and avian care tips.
Here’s to new beginnings, one dove egg at a time.
—Rifat Ahmed